Have you ever set up your projector, eager to enjoy a movie or presentation, only to be met with a frustrating, distorted image that looks more like a trapezoid than a perfect rectangle? This common visual anomaly, known as the keystone effect, can quickly dampen your viewing experience. While modern projectors offer various solutions, understanding the underlying causes and the most effective corrective measures is crucial for achieving a crisp, perfectly rectangular display. This guide will walk you through everything you need to know about fixing trapezoid images, from optimal projector placement to the intelligent use of keystone correction.
Understanding the Trapezoid Image: The Keystone Effect
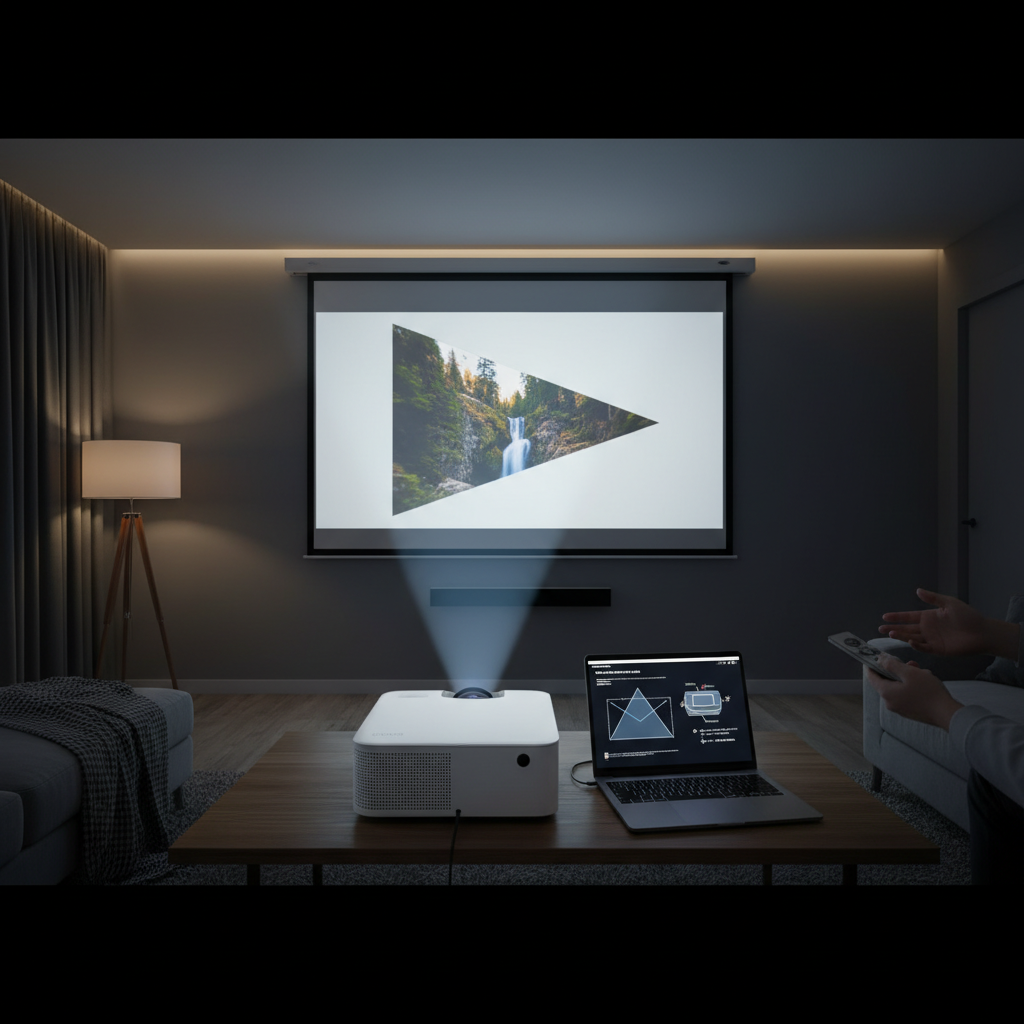
The “keystone effect” is the apparent distortion that transforms a projected image into a trapezoidal shape instead of a true rectangle. This visual imbalance typically occurs when your projector is not positioned perfectly perpendicular to the projection surface. Imagine a scenario where the projector is tilted upwards from a low table: the top of the image will appear wider than the bottom. Conversely, if the projector is angled downwards from a ceiling mount, the bottom of the image might stretch wider.
This distortion arises because the light beams from the projector’s lens strike the screen at varying distances and angles. The corners of the image that are closer to the projector will be smaller, while those further away will be larger, resulting in the skewed, wedge-like appearance. While vertical keystone distortion (top/bottom widening) is most common, some setups can also experience horizontal distortion (side-to-side widening).
Your First Line of Defense: Physical Projector Placement
Before diving into any digital adjustments, the golden rule for achieving a perfectly rectangular image is to ensure your projector is physically aligned with your screen. The ideal setup dictates that the projector’s lens should be perfectly perpendicular to the screen’s surface, meaning the lens plane is parallel to the screen plane. This fundamental principle eliminates the need for any artificial correction, preserving the native image quality.
Consider these tips for optimal physical placement:
- Center Alignment: Position the projector as close to the center of the screen as possible, both horizontally and vertically.
- Level Surface: Ensure the projector is placed on a stable, level surface or securely mounted. Many modern projectors have adjustable feet to help fine-tune minor tilts.
- Proper Mounting: If mounting your projector to a ceiling or wall, invest in a quality mount that allows for precise adjustments. Carefully measure and plan the installation to align the projector perfectly with the screen.
- Screen Interaction: Ensure every corner of the projector is the same distance from its opposite corner on the screen. Any deviation will lead to a trapezoidal shape.
“The most effective way to combat keystone distortion is at the source: proper projector placement. Digital corrections are compromises, but physical alignment is pure perfection.” – Dr. Eleanor Vance, Audiovisual Systems Engineer
Leveraging Lens Shift: The Optical Advantage
For those with projectors equipped with lens shift capabilities, you have a powerful optical tool at your disposal that offers a significant advantage over digital keystone correction. Lens shift allows you to physically move the projection lens assembly up, down, left, or right without altering the projector’s physical position or tilting the unit.
Here’s why lens shift is often preferred:
- Preserves Image Quality: Unlike digital keystone correction, lens shift is an optical adjustment. It manipulates the light path before it leaves the lens, meaning it does not digitally scale or compress the image. This ensures that the native resolution and sharpness of your projected content remain uncompromised.
- Flexibility in Placement: Lens shift provides more flexibility in where you can place your projector, allowing for off-center installations while still achieving a perfect rectangle. This is particularly useful in rooms with architectural constraints or when integrating the projector seamlessly into your decor.
- Ease of Adjustment: Typically, lens shift is adjusted via physical knobs or levers on the projector itself, offering intuitive and precise control over the image position.
While lens shift is a premium feature often found in higher-end projectors, if your device has it, always prioritize its use over digital keystone correction for the best possible picture quality.
Digital Keystone Correction: A Last Resort Solution
When ideal physical placement or lens shift isn’t an option, digital keystone correction becomes your go-to feature. This technology helps restore a rectangular image by digitally altering the projected picture. But how does it work, and what are its implications?
How Digital Keystone Correction Works
|
Our Picks for the Best Mini projector in 2026
As an Amazon Associate I earn from qualifying purchases.
|
||
| Num | Product | Action |
|---|---|---|
| 1 | HP Smart Mini Projector with WiFi and Bluetooth, Short Throw Projector, Native 1080P Full HD, Official Licensed Apps, Auto Focus & Keystone, Portable Movie Projector for Bedroom & Outdoor |

|
| 2 | CiBest Mini Projector, Upgraded Full HD 1080P Support Video Projector, Portable Small Movie Projector, Compatible with iOS/Android/Windows/TV Stick/Box/USB/HDMI |
|
| 3 | Magcubic Mini Projector with WiFi 6 and Bluetooth 5.4, Portable Projector 4K Support, 5W Soundbase Speaker, Auto Vertical Keystone 180°Rotatable Smart Proyector for Movie Home Outdoor |
|
| 4 | [Built-in Apps] CLOKOWE Mini Projector with WiFi and Bluetooth, 2026 Upgraded 1080P Smart Portable Projector with 180° Rotation, Auto Keystone, Compatible with iPhone/Android/Laptop/TV Stick/HDMI/USB |
|
| 5 | 【Built-in APPS & Electric Focusing & 210° Rotation】Mini Projector With Wifi And Bluetooth, 1080P Portable Projector, Movie Projector for Bedroom, Supports Smartphones/TV Stick/iPad/PS5/Laptop/HDMI/USB |
|
| 6 | HAPPRUN Native 1080P Bluetooth Mini Projector, Full HD Portable Outdoor Movie Projector with Built-in Speaker, Compatible with Smartphone, HDMI, USB, AV, Fire Stick, PS5 for Home, Bedroom, Outdoor Use |
|
| 7 | Optoma 4K UHD Projector HDR High Brightness Home Theater DLP Technology White Compact Design Gaming Ready Streaming Bundle HDMI Cable CPS 12 Month Protection Plan Included |
|
| 8 | Mini Projector, ELEPHAS Portable Projector for iPhone, 7000L with Synchronize Smartphone Screen, Movie Projector with 1080P HD/200 Screen Support, Compatible with Android/iOS/TV Stick/HDMI/USB/SD |
|
| 9 | Mini Projector with WiFi 6 and Bluetooth 5.4 Built-in Apps for Bedroom Portable Projector Android 14 Smart Auto Keystone 1080P 4K Support Compatible with iOS/HDMI/TV Stick VisualCube 300 White |
|
| 10 | Mini Projector with Wifi 6 and Bluetooth5.4, Portable Projector 4K Support, Android 14 Smart Proyector with 200ASIN & Auto Keystone, Alwtniet HY300Pro Small Proyector for Bedroom, Movie, Outdoor |
|
Digital keystone correction processes the image before it leaves the projector’s lens. Essentially, if your image is wider at the top, the projector digitally “squashes” the top portion, or expands the bottom portion, to make it appear rectangular. This involves mathematically shrinking or expanding pixels horizontally or vertically to square off the distorted shape.
How to Apply Digital Keystone Correction (Step-by-Step)
Most modern projectors offer both automatic and manual keystone correction options.
- Access the Projector Menu:
- Turn on your projector and display an image, preferably a test pattern or a grid, to make distortions visible.
- Using your remote control or the physical buttons on the projector, navigate to the main menu. Look for sections like “Settings,” “Picture,” “Image Correction,” or “Installation”.
- Locate Keystone Settings:
- Within these menus, you’ll typically find “Keystone Correction,” “V Keystone” (Vertical Keystone), and sometimes “H Keystone” (Horizontal Keystone).
- Adjust the Image:
- Manual Correction: Select “V Keystone” (or “H Keystone” if available). Use the arrow buttons (up/down for vertical, left/right for horizontal) on your remote to adjust the image.
- If the bottom of the picture is wider than the top, adjust the V Keystone to a negative number (-).
- If the top of the picture is wider than the bottom, adjust the V Keystone to a positive number (+).
- Automatic Correction: Some projectors offer “Auto Keystone Correction.” Activating this feature, often found in “Projector Options” or similar menus, allows the projector to self-adjust the image instantly when its position shifts, often using built-in sensors. If auto-correction seems off, try calibrating it by placing the projector on a level surface first.
- Manual Correction: Select “V Keystone” (or “H Keystone” if available). Use the arrow buttons (up/down for vertical, left/right for horizontal) on your remote to adjust the image.
- Fine-Tune: Make small, gradual adjustments until the image appears perfectly rectangular.
The Downside: Why Less is More with Digital Correction
While digital keystone correction is convenient, it comes with a significant trade-off: reduced image quality.
- Resolution Loss: All digital projectors use a fixed number of pixels. When you apply keystone correction, the projector is forced to scale the image, essentially drawing a trapezoid within the original rectangular pixel array and discarding unused pixels. This means you’re no longer using the projector’s full native resolution. For example, a 4K projector extensively using digital keystone correction might effectively output an image closer to 2K resolution.
- Decreased Sharpness and Clarity: The digital processing involved in reshaping the image can lead to a noticeable loss of sharpness, clarity, and detail. Edges may appear softer, and fine text or intricate graphics might become less distinct.
- Potential for Artifacts: Over-correcting can introduce pixelation and other visual artifacts, further degrading the viewing experience.
Therefore, digital keystone correction should always be considered a last resort. If you must use it, apply it sparingly and with the smallest possible adjustments to minimize its negative impact on picture quality.
Troubleshooting Common Keystone Correction Issues
Even with the best intentions, you might encounter issues when trying to fix a trapezoid image. Here are some common problems and their solutions:
- Keystone Adjustment Unresponsive: If adjusting the keystone settings has no effect, first verify that you are in the correct menu and that the feature is enabled. Check your projector’s user manual for specific instructions. Ensure your projector’s firmware is up to date, as bugs can affect controls. If using a remote, check its batteries and try the physical buttons on the projector itself. A factory reset can sometimes resolve software glitches.
- Auto Keystone Correction Not Working Correctly: Automatic keystone systems often require a baseline. Calibrate your projector by placing it on a perfectly level surface and running the auto-correction function. If calibrated while tilted, the system might get confused and provide inaccurate corrections.
- Physical Knobs or Dials are Stuck: For projectors with mechanical keystone or focus controls, sometimes they can become stiff. Apply gentle, steady pressure while turning or pressing them slowly. Avoid forcing them, as this could cause damage.
- Image Quality Drastically Reduces After Correction: As discussed, this is an inherent drawback of digital keystone correction. If quality loss is significant, your primary solution should be to re-evaluate and improve your projector’s physical placement to minimize the need for digital correction.
- Black Borders Around the Image: When digital keystone correction reshapes the image, it effectively shrinks the active projection area. This can leave unused, unlit portions of the projector’s native output around the corrected rectangular image, appearing as black or gray borders. This is another sign that physical alignment is paramount.
Best Practices for a Perfect Projection
Achieving a consistently perfect image requires a holistic approach that prioritizes optimal setup.
- Prioritize Physical Alignment: Always strive to position your projector perfectly perpendicular to the screen. This is the single most important factor for maximizing image quality and avoiding distortion.
- Use Lens Shift When Available: If your projector offers lens shift, leverage it for fine-tuning image placement without compromising resolution.
- Minimize Digital Keystone Correction: Treat digital keystone as a last resort. If absolutely necessary, use the smallest possible adjustments to minimize quality degradation.
- Use Test Patterns: When setting up or troubleshooting, project a grid or test pattern. This makes any distortions immediately obvious and helps you make precise adjustments.
- Consult Your Manual: Projector models vary. Your owner’s manual is an invaluable resource for specific menu navigation, adjustment methods, and troubleshooting tips unique to your device.
Conclusion
A perfectly rectangular image is not just aesthetically pleasing; it’s essential for the optimal viewing experience your projector is designed to deliver. While the keystone effect can be a frustrating challenge, you now have the knowledge to tackle it effectively. By prioritizing precise physical placement and optically correcting with lens shift where possible, you can largely avoid the image quality compromises associated with digital keystone correction. Remember to use digital correction sparingly, understanding its limitations, and always consult your projector’s specific settings. Take the time to set up your projector correctly, and you’ll unlock its full potential, transforming your projected content into a stunning, distortion-free display. What’s your go-to method for achieving the perfect projector setup?
Frequently Asked Questions
Does keystone correction reduce image quality?
Yes, digital keystone correction significantly reduces image quality. It works by digitally scaling and reshaping the image, which means fewer pixels are used to create the final display, resulting in a loss of resolution, sharpness, and clarity. Optical adjustments like lens shift do not suffer from this drawback.
What is the difference between vertical and horizontal keystone correction?
Vertical keystone correction addresses trapezoidal distortion where the top or bottom of the image is wider. Horizontal keystone correction (less common, typically in professional projectors) fixes distortion where one side of the image is wider than the other. Both aim to square off the image.
Can I fix keystone distortion without using the projector’s built-in feature?
Absolutely. The best way to fix keystone distortion without using the built-in feature is through optimal physical placement of the projector. Ensure the projector’s lens is perfectly perpendicular to the screen. Additionally, if your projector has an optical lens shift feature, this allows you to move the image without digital manipulation or quality loss.
My automatic keystone correction isn’t working right. What should I do?
If your auto keystone correction is faulty, ensure your projector is placed on a level surface, and then try recalibrating the auto-correction feature through your projector’s settings menu. Sometimes, calibrating it while the projector is already tilted can lead to inaccurate adjustments.